Tuesday 24 December 2013

21st Birthday Cake for Tom

I had to delivery 21st Birthday Cake for Tom.  It was ordered by her mother, Kerrie, who happens to live close by :)

She has chosen Moist Chocolate Cake with Peanut Butter Buttercream.
This cake menu has been on my cake menu for 2 years and no one has ever order it yet.
Although my family love it, I think it is quite new for other people.
So I am excited when she chosed Peanut Butter Buttercream!

Her son, Tom, is not fuss on what kind of cake decoration for his cake.  I suggested chocolate decoration in chocolate color.  It will be different if it was for a girl, I can put Butterflies, flowers, etc, you know... the girlie cake decoration.

So I came up with chocolate "gate" with swirlies pattern surrounding the square cake, filled the top with white chocolate shards, and melted chocolate with swirlies pattern too as the topper plus the wording.

First, of course, I baked the cake.  Let it cool completely, covered with cling wraps and aluminium foil, then into the fridge overnight to set the cake crumbs.  If not, cake crumbs will be "in the way" when I put buttercream on it.

She ordered 1 x 9" square cake, but since she will order a Wedding Cake next year for her daughter too, I gave her 10" as a compliment.

I prepared the cake board base and the cake board too on the first day.  Melt some dark chocolate in microwave then using silicon brush, brushed it on the cake board base.

The next day, I made Peanut Butter Buttercream.  Once finished, I covered it with cling wrap so it won't go "dried".  For 1 x 10" square cake, I need at least 9 cups of buttercream.


Then I took out the cake, torte it, filled and covered with buttercream.  Let the buttercream set in the fridge until I am ready to decorate it.

All of my cakes are 4" / 10 cm in height.
So I start by preparing the square pattern on a baking paper, make square shape 2 " / 5 cm x 5" / 12.5 cm in Height,
prepare large swirlies patterns,
then melting some white chocolate in the microwave,
apply the white chocolate on the patterns, then scrap it off, leaving melted white chocolate in the pattern.
I melted dark chocolate in a microwave, apply on top of the white chocolate, wait until the chocolate is almost dried, put the square pattern on it, using cleaned stainless steel ruler to create the chocolate shape and they looked like this:


After that, I put the swirlies pattern into the fridge for 15 minutes.  Took them out, then take the square one by one off the pattern mat.  Take the cake out too.  Immediately using melted chocolate, "glue" them one by one on the side of square cake.

Once that done, take a block of white chocolate, using sharp knife to make white chocolate shards and scattered them on top of the cake.

I melted some white chocolate in microwave, filled the letters and numbers chocolate mold with it, leave them in the freezer.

Still using the swirlies pattern mat, apply some melted dark chocolate on it, make sun shape, put the mat into the fridge for about 5 minutes, took it out, peel it off and put it on top of white chocolate shards.

Took letters and numbers chocolate mold from the freezer then tap them out.  Use melted white chocolate to  "glue" them on top of the sun-like shape dark chocolate.

Put brown fabric ribbon on the cake board base to complement the look of the cake.

And here is the final result:


I delivered this cake on 22nd December 2013.  When Kerrie open the cake box, she said "Oh, it's beautiful!  Thank you, Lena!"  You know what?  That is my "reward" :)  Yes, everytime my customer is happy whether it is direct compliment or via email, it will be my "reward" :)

Hope you had a great 21st birthday party, Tom.  And Thank you very much, Kerrie for your trust.   Look forward to working closely with your for your daughter, Louise's Wedding Cake in 2014!  :) x


Thank you for looking (^_^)


Thursday 12 December 2013

Ivory Wedding Cake and Light Pink Extra Large Sugar Rose


Sharna came to me with this wedding cake design
I can't find the original cake decorator of this cake.
If you know, please let me know :)

Now I have to search for the lace.
Even though Sharna doesn't mind if I use a similar look
of sugar lace, as much as I can I would like to use the same one.
And I found it! It's from Paradoxx.

Sharna will come and pick-up her wedding cake,
so I would like to "give something back" to her.
I offered her a free extra large sugar rose,
and she has chosen light pink color.

So here is the cake in ivory color,
with sugar lace dusted in CK Antique Silk dust,
and light pink extra large sugar rose.


It was in size 7" and 9",
you can see from below photo that the extra large sugar rose
spreading from side to side almost 17.5 cms.
It is really large indeed!


Close-up photo for the sugar rose


I made this extra large sugar rose and leaves using this method.


Do you realize there is a gap between sugar lace?
Here is the close-up look.


This is what it looks like after "filling".


Once brushed with CK Antique Silk dust, the color blends in beautifully!
See how pretty it looks now? :)

Huge Congratulation to Sharna!
I wish you both HAPPILY EVER AFTER!
and Thank you very much for your trust xx


I thought I made a single medium size sugar rose
with few fillers and leaf.
This one looks romantic to me and I heart it!


Thanks for looking! (^_^)


Thursday 14 November 2013

Ivory all the way!!


Huge Congratulations to Angela and Jonathan
who got married today, 15.November.2013
at Wandin Valley - Hunter Valley.

I wish you both HAPPILY EVER AFTER.


Thank you very much for trusting me to create your wedding cake :)


The Design Process

This cake were made based on Angela's Wedding Dress and Flowers

Angela's Wedding Dress


I sketched 3 different cake designs for Angela,
and she chosed the one below:


The Extra Large Sugar Rose
Brushed the petals one by one with confectioners glaze,
wait for them to dry,
then brushed them again with petal dust before assembling them.

If they are in colors other than ivory, I would steam them briefly.


The topper was my Extra Large Sugar Ivory Rose.
The top-tier is size 6" and the diameter of this flower is just as big as top-tier itself.


This cake were created based on Angela's Wedding Dress.  
Only 1 color for this cake: IVORY.  That is why I called it "Ivory All the Way".


When I was creating the decoration,
since the topper will be a sugar rose,
I made the cameo - a rose cameo - so it will be "in line" with the topper.
I made the cameo from 2 different moulds,
honestly need a lot of work to make them look "perfect",
especially the edges.  Honestly I can't say that I am satisfied with the moulds,
the rose mould doesn't fit into the frame mould perfectly.
But I am happy with the way they look after putting some "foundation and powder" on them :)

For the color, instead of ivory petal dust,
I used CK CAPPUCINO petal dust,
CK SILK WHITE and ANTIQUE SILK lustre dusts.

The photo below shows the final product of rose cameo:
I LOVE IT!!


The Venue

Here is photo of the room, so romantic with pink accent on it :)


On the way out, I saw some Roos / Kangaroos just outside the venue!
They were just relaxing under the trees, when I came out of the car
and walk closer to them they started to stand,
then they ran away :)
I saw few Joeys too, so cute :)

Such a "sweet treat" for me!


Thanks for looking >^..^<


Thursday 7 November 2013

2 Cake Tasting Cakes 8.November.2013


These 2 cake tasting cakes were ordered by
Kerry (the Bride's Mother).

She came with her daughter and her daughter's fiance about a month ago.
Her daughter lives in Canberra but will have her wedding in Pokolbin next year.

Kerry ordered my "Death by Chocolate" and "Chocolate and Baileys".


They were picked-up early this morning,
and now on their way to Canberra.

I hope you all like the cakes :)


Wednesday 6 November 2013

One of the reasons why I love what I do.

I will have a wedding cake to delivery next week on 15th November 2013.  It will be for Angela (who already booked since last year), a 3-tier cake and she trusted me to designed her cake too! :)   On her last email a month ago, she wrote that she will email me again to see if everything is in order as there is no need for the Bride to stress.

So on Monday, 4th November 2013 I sent her an email, informing her that everything is in order and explaining the whole process of baking, and decorating including the process of making the Extra Large Sugar Rose for her wedding cake topper.

This is her reply:
"wow your amazing! I'm so glad I have you on my team.  I wish everyone I have worked with is as brilliant, proactive and as adaptable as you.
Thanks
Ange"

This is one of the reason why I love what I do.  Most of my clients are nice and appreciate what I do.  And whenever I get good comments, it always makes me want to "give" more.

Thank you very much for your thoughts, Angela.  I am excited and looking forward to delivering your wedding cake :)  And most of all, Thank You Very Much for choosing and trusting me to create your wedding cake.  It means a lot to me :)

Thursday 24 October 2013

A Reminder to myself on Tiered Cake Construction


 Prepare the cake boards and cake board base.


 Clean them with mixture of water and white vinegar,
then clean them again with alcohol.
Not only to clean but also to prevent mold.


Prepare the ganache a day before,
let them set overnight before using them.


 Prepare the cake, and torte them.


 I used chocolate ganache to "glue" them.
This will be my working board.


 Put some ganache at the bottom of cake board.


 Start filling the cake.


 Crumb coat.


 Finally, cover the whole cake with ganache.


 Prepare the cake board base.
Cover it with gum paste, it dry faster.
Make a hole on gum paste for middle dowel.


 Melt some fondant - thick consistency.


 Insert dowel in, let it set overnight.


 Set up the cake.  I used bubble tea straws.
They are not just very sturdy and food grade.


 Now put the bottom tier on the cake board base.
It will look like the above photo.


 Stack them all.
See the imperfection?  Lucky this cake was "sealed" with fabric ribbon.
So, no worries! :)


Here is the cake, stacked and "sealed" with ribbon,
ready to decorate.

As time goes by, I learnt that I can use only bubble tea straws, without middle dowel for 3-tier cake.
It is sturdy enough to handle the cake weight.
Only for 3-tier cake, not for more than 3-tier.


**Thanks for Looking**


A Reminder to myself on how to Make Pleated Gum Paste or Fondant


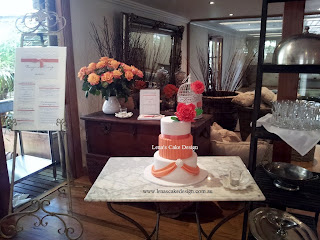
Last weekend I had to deliver a coral/peach colored theme wedding cake.

It was a 3-tier cake with extra large peach/coral colored gum paste rose.


The Extra Large Sugar Rose
For the extra large gum paste rose, i always use egg shape foam.
The bigger the egg shape foam, the larger the rose is going to be.
So i used a real size egg - egg foam about 5cm in height.

I posted how I make XL gum paste rose here.


I made the gum paste rose leaves manually.

Started with the leaf silicon mold.
I used a universal leaf silicon mold for these leaves.
Rolled the green leaf colored gum paste on it.
Cut the leaf shape using scissors.

'Peel-off" the leaf carefully then thread in floral wire.

I made some unwired.


I used this tool to create rose leaf edges.


Once finished and dried, i brushed all of them with confectioner's glaze.


For the calyx, i use Clematis cutter,
and create the edges the same as rose leaves.


This is the finished product :)
Coral / Peach colored gum paste extra large rose


I also made white one :)


The Design Process

Here is the bride's wedding dress:

Close up on the details:

Here is my cake sketch:

Here is the cake :)

And the cake close-up photo :)


My extra large gum paste sugar rose :)


Huge Congratulations to Tanya and Craig!
Wish you HAPPILY EVER AFTER!

I Thank You Very Much for your Trust :)

Here is the lovely comment from them :)

Hi lena,
A big thank you for our beautiful wedding cake looked amazing and tasted Devine !
All guests complemented how wonderful it was truly a work of art !
Sharon the owner of leaves and fishes also complemented your professionalism and I'm sure she will be recommending you to other brides in the future.
Again many thanks
The day was just fantastic the best day ever.
xx Tanya and Craig !


^^Thanks for looking^^